A problem that often arises in the creation of panoramic photographs from many individual shots is vignetting. This is an optical defect of camera lenses,
that create images in which the borders are darker than the center. The amount of vignetting changes from lens to lens, and is less noticeable in expensive ones.
Digital cameras zoom lenses often show a high level of vignetting in wide angle position,
especially at wider apertures. The same happens to most fixed wide angle lenses, but at a lower level.
Vignetting is not much an issue in single photographs, since it is not easy to notice. It can become a problem when you stitch many photographs together: in the final image you can have a sky with lighter parts (at the center of an image) and darker ones (where two borders overlap).
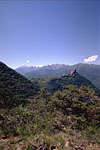
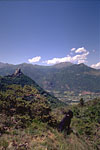
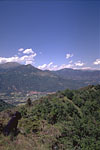
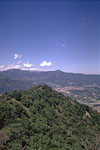
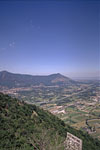
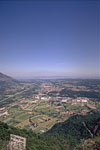
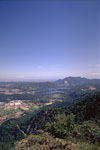
For example, this pictures (old Photo CD scans from slides, with huge
vignetting):
yield this result:
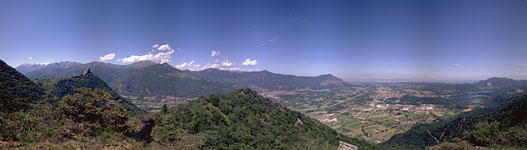
where the sky has problems.
This is the result after a quick correction of vignetting:
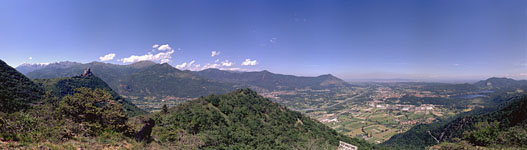
which is clearly better.
Vignetting is stronger at wider apertures of the lens (i.e. f/2.8), so when shooting photographs that will be later stitched together you should use a small aperture (i.e. f/8 or f/11). By the way this will give better optical quality, too.The left part of the window contains 10 textboxes used to define the correction. Each diagonal, from the center to the border, is divided in 10 parts, thus creating 10 points (excluding the center). The last point is at the border.

At the right of the text boxes there is a graphic of the resulting correction along a diagonal. At the left there is the center of the image, at the right there is the border. Using 10 point gives you the ability to correct vignetting with high precision.
The lower part of the window lets you define the files to be corrected. You first select a drive, then a folder and then one or more files.
To select more than one file just follow the Windows standard: click on the
first file, scroll the listbox (if you need it), keep pressed the SHIFT key and
click on the last file. Files must be in Windows bitmap format:
the program will not recognize other formats.
In the upper right corner there is a text box in which you define the prefix to be used to create the name of the output files. The corrected files are saved in the same folder, using the prefix to modify the original file name. For example, if a file is named
DSCN0024.bmp and the prefix is vc, then the resulting name for the corrected file
will be vcDSCN0024.bmp.
At this point you can press the Correct images button to start the conversion process.
The program is rather slow while correcting the first image, while the
correction of the other images is much faster.
Vignetting is usually centered, i.e. the brightest point of the image is in the geometric center of the image and pixels are progressively darker moving from the center to the border.
In some compact cameras, like my Nikon Coolpix 5000, this is not true. In the Coolpix 5000, for example, the left side of the image is darker then the right side. It happens that the center of the vignetting is moved to the right of the image geometric center: the left side is farther than the right side and so it is darker.
Here is an example:

Photograph of a uniform gray surface. |
High contrast version of the same image, showing the location of lightest pixels |
You can correct this problem with the center offset text boxes, in the right part of the window. If you leave them empty the program assumes that the center of the vignetting is in the center of the image.
A number in the X text box moves the center horizontally: a positive value moves to the right, a negative value moves to the left. The unit of measure is in percent of the width of the image, so if the image has a width of 2000 pixels and X offset is set to 10 the center moves right from 1000 to 1200 pixels.
A number in the Y text box moves the center vertically: a positive number moves down and a negative number moves up. The unit of measure is in percent of the height of the image, so if the image has an height of 2000 pixels and Y offset is set to -10 the center moves up from 1000 to 800 pixels.
As an example, here's a screenshot of the program's main window when it is ready to start the correction of images taken with a Nikon Coolpix 5000 in landscape mode:
Of course, with many cameras the offsets fields will be empty.
Click here to download the program (20Kb). The program does nor require any setup, just copy it in a folder and run it.
This program works only on Windows computers. It is written in Visual Basic 6 so it needs the Visual Basic Runtime, which is almost certainly already installed on your computer. Just try and run the program, if it does not work you will need to download the runtime from here.
I hope that you'll enjoy using this program, at least as much as I enjoyed writing it. Please feel free to contact me for bug reports, suggestions and impressions at the following e-mail address: fsenore@ica-net.it
Fulvio Senore
If you create panoramic images you may be interested in this free panoramic viewer.